Many armwrestlers allow themselves to omit details during their training, which shows during their fights. One of the most common mistakes is the positioning of the shoulder before “Ready,Go!”.
Why is that?
First of all, many fighters ignore the rules of armwrestling regarding proper shoulder positioning. Notice that a minimal kink in the wrist creates a lot of advantage at the start. Usually this is the fault of coaches and sparring partners, who make this mistake during trainings. In a fight, it’s often enough to make a little correction to the wrist position and the fighters have their work cut out for them.
The second major problem is performing technique properly in different stages of the fight. In this case the knowledge imparted in this text is very useful.
Remember that you should learn to employ not only strength, but also technique. A lot of technique is involved in fighting with the hook, because not only muscles and tendons are involved, but also leverage. We will attempt to demonstrate the leverage in one of the hook style techniques.
SOME HOOK DETAILS
PROPER POSITIONING FOR HOOK BEFORE „READY,GO!”
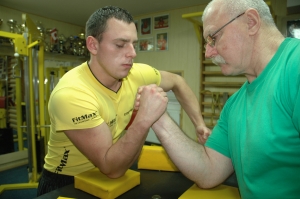
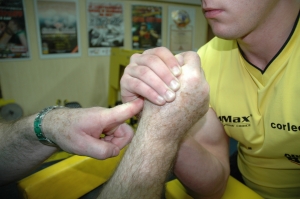
Notice how the fighter in the yellow t-shirt is holding the opponent’s hand – there is empty space under his pinky finger and between it and the opponent’s wrist.
PROPER EXECUTION OF FIRST PHASE OF HOOK ATTACK
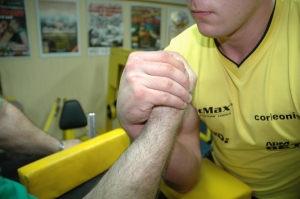
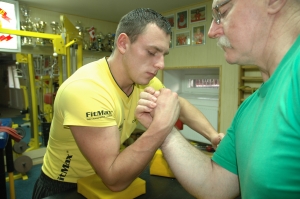
After “Ready – Go!” the fighter moves his body forwards and sideways, bending and pronating his wrist.
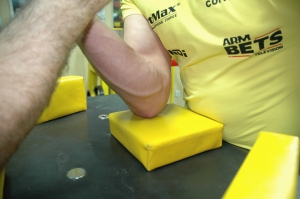
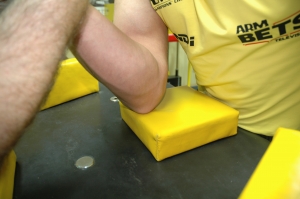
The elbow of the fighting hand is moved forward at the beginning.
PROPER EXECUTION OF SECOND PHASE OF HOOK ATTACK
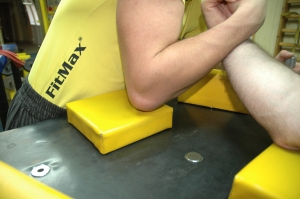
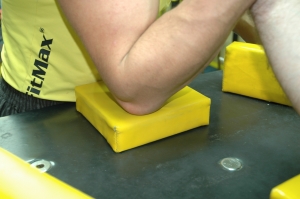
Elbow is moved sideways on the edge of the pad.
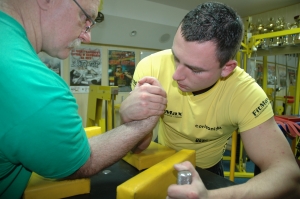
The movement of the body and elbow to the side puts the opponent at a disadvantage. As you can see, the left-hand opponent uses only his bicep to defend.
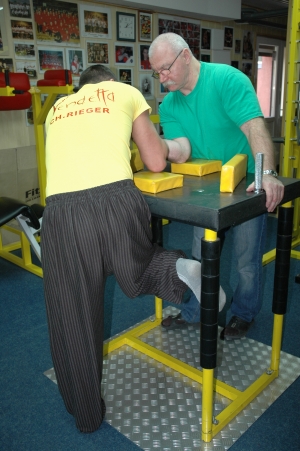
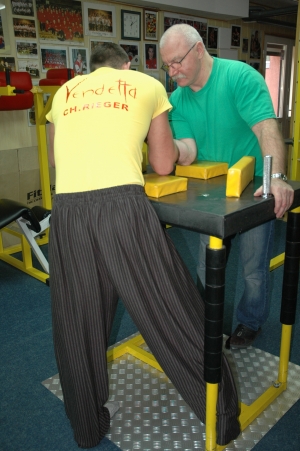
Light- and middle-weight contestants may utilize their leg to help themselves get more leverage in this technique.
PROPER EXECUTION OF THIRD PHASE OF HOOK ATTACK (PULLING)
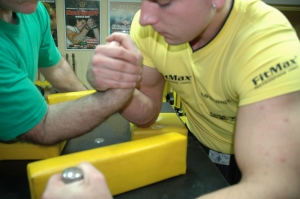
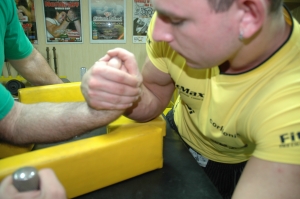
An experienced fighter knows how to use elbow space. In the attack phase one needs to pull the opponent towards one’s body, always keeping the fighting elbow on the pad. This will help us to extend the angle between his arm and forearm.
PROPER EXECUTION OF ENDING PHASE OF HOOK ATTACK
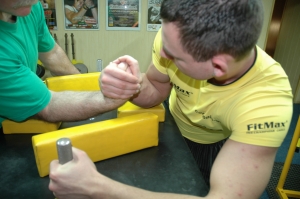
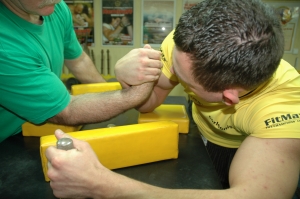
To properly end the attack and preserve strength for the next fight, one needs to block the opponent’s arm by moving one’s elbow forward on the pad, bending the wrist towards one’s own body.
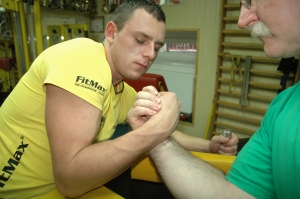
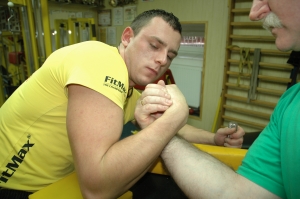
Notice that after the elbow is moved, the opponent’s fingers have lost almost all touch with the attacker’s hand.
ONE EXERCISE – MANY EFFECTS
Many of you ignore the weak spots of your arm from the point of view of the whole fight (whole movement). Perform the exercises below with attention to its many facets. In #1, only pronation is used. In #2, pronation is combined with chest muscles force.
In #3, triceps joins the wrist and chest. Is the weight used the same for all three exercises? YES! But if the individual muscle sections (especially wrist) cannot perform the movements, focus on isolation exercises. Remember, that the base for this exercise is proper wrist pronation form. In many cases the chest muscles might be weaker than the wrist – focus on #2 then. When triceps is really weak in #3, consider a change of style (from hook to another), because the triceps plays a major role in this technique. However, pronation is the most important. If in #3 you can press the arm, but the pronation is not full, focus on isolation - #1.
EXERCISE #1
WRIST PRONATION USING PULLEY AND THICK ROPE. CABLE IN LOWER SETTING.
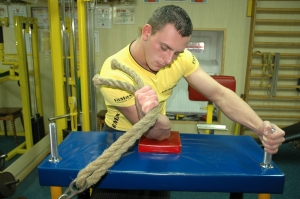
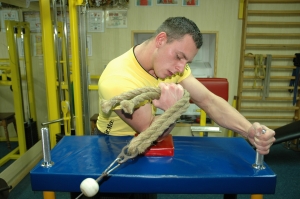
Elbow rested on half-table. Engage wrist only.
EXERCISE # 2
WRIST PRONATION USING PULLEY AND THICK ROPE. CABLE IN MIDDLE SETTING.
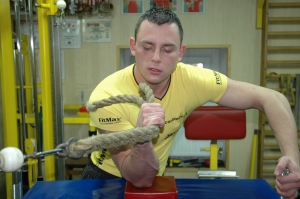
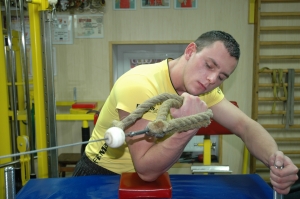
Elbow rested on half-table. Engage wrist and chest muscles.
EXERCISE # 3
WRIST PRONATION USING PULLEY AND THICK ROPE. CABLE IN UPPER SETTING.
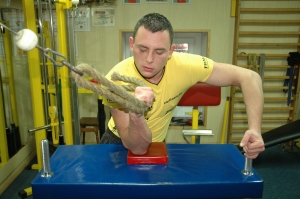
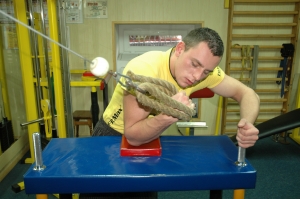
Elbow rested on half-table. Engage wrist, chest muscles and triceps in final phase.
Editorial staff

